

We have a broken system for growing and handling local wheat. In order to fix it, we’ll need to work together. The time has come to take a good, hard look at our flour and how it is currently being produced. If we want a better, local product we have choices to make. Those choices become more time sensitive if you are concerned, as I am, that some day in the not-too-distant future planting GMO wheat will be permitted and the race to control our own wheat seed sources will be over before it begins.
I can’t speak to the economic details of other wheat growing regions, but I can tell you that in California, if you want to support your local farmers growing heritage wheat, you can no longer compare their grain and my flour to big national brands. You can’t even compare them to the smaller more exclusive West Coast brands that many of you may be familiar with. Those products are the result of industrial scale growing and industrial roller milling. Any associations we have with pricing and end product based on those parameters will have to be thrown out the window: You would be comparing apples to oranges.
If you look today at the commodity pricing for wheat, which you can do here (http://www.quotewheat.com) you will quickly understand why I don’t have a line of farmers snaking around the block at Grist & Toll, all vying for the chance to grow wheat for me. On the day I am writing this blog post, the commodity price for hard red wheat is 473.25 cents ($4.7325) per bushel (60 pounds), which equals $.078875, or about 8 cents per pound.
Just as it is for every business on the planet, profitability for farming is a numbers game that can be summarized like this: maximize production/output, minimize fixed costs. Obstacle number one for CA farmers: higher fixed costs for land, especially for leased irrigated cropland. At a selling price of $.08 per pound, even without factoring in any additional fixed or variable costs at all (such as seed, soil amendments, equipment rental, employees, cleaning, storage etc.), some easy math will show that commodity market pricing for wheat is a non-starter when trying to piece together a local wheat growing system. Heritage wheat growers are averaging 800 to 2000 pounds per acre in yields, which would net the farmer $64-$160 per acre, not enough to cover even a modest lease cost per acre, let alone any of the additional, real business costs.
From that one simple exercise, you can see that a Southern California farmer will need to fit wheat into a smart crop rotation with other much higher cash value crops such as fruits and vegetables. He/She won’t be able to rely on wheat as the main crop and source of income. We have devalued wheat to such an extent that, on its own, it simply can’t command a high enough price to be profitable unless the farmer has hundreds to thousands of acres of extremely low rent land –- pretty unlikely in CA, with odds decreasing dramatically the closer we get to the greater Los Angeles metropolis.
What does this mean for me as a startup flour mill and what does it mean for you as the end consumer? It means taking a breath and changing our expectations. It means understanding that we are charting this course together for the first time. Flour milled from local wheat will be more expensive than a commodity product. Why? Because commodity pricing favors Big Ag and doesn’t add up for the local farmer, and without the local farmer growing the wheat, there is no resource to build.
By creating market support for local flour, we begin to put ourselves back in the driver’s seat. Farmers who know they have built-in customers for their wheat and a direct link to consumers are more likely to take the additional risk of planting experimental varieties, like heritage grain, or older types that haven’t been grown in many years; in other words, planting public seed that can be saved and replanted vs. PVP (Plant Variety Protection) seed that is owned by large corporations and must be repurchased each planting season. Heritage and other experimental wheat may sometimes have lower yields but higher market value in that it has flavor, character, more genetic biodiversity or even more to the point, that it would allow us to control our seed resources. Having more local product available will also push us to rebuild some of our missing infrastructure that currently adds on higher costs as well, such as trucking, cleaning and storing grain which now take place far, far away from the city centers.
We face challenges, yes, but CA wheat farmers also enjoy some significant market advantages. Because of our climate, we can plant wheat in the spring and also in the fall, which offers more rotation flexibility. With modern wheat varieties, our yield potential is on the very high side: 4000-6000+ pounds per acre. I’ve even heard tall tales of close to 8000 pounds per acre. Midwestern states dwarf us with wheat volumes, but not due to higher yields per acre, rather due to the vastness of acres planted. Their yields, even with modern wheat, are closer to 2000-3000 pounds per acre. And, again, thanks to our soil and climate, the size of our wheat kernels tends to be larger, which is very desirable for milling, by the way.
It is critical that we regain at least some level of control over a food resource as important as wheat. We can’t afford to continue the cycle of mono-cropping then “fixing” the soil and plants with chemicals instead of smart crop rotation and throwing down seed that farmers can save and be the stewards of themselves. It’s a very tangled web we weave when seed control rests in the hands of a few very large corporations. Check out this video:
https://www.youtube.com/watch?v=vYhNryOPSJ0
We deserve better flour –- flour with actual flavor and aroma and transparency from field to shelf. I, for one, have been hungry for the choice between bland industrial flour and a more nuanced, local product. Now I know I have a choice. As little as three years ago I didn’t. With local grain growing and milling on the rise, before too long everyone may have a choice. Let’s choose wisely.
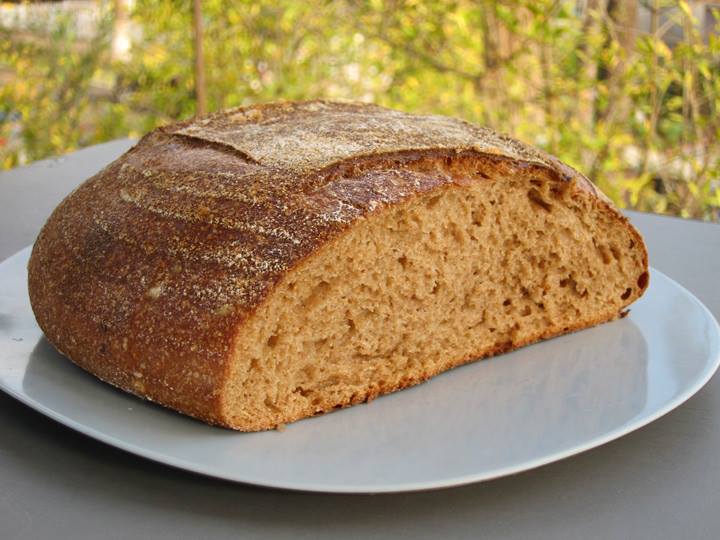
A Local Wheat Recipe: The Hard Red Joaquin Oro Loaf
This bread formula is courtesy of Erik Knutzen. He is the co-founder of the Los Angeles Bread Bakers and along with his wife Kelly the author of “Urban Homestead: Your Guide to Self-Sufficient Living in the Heart of the City.” They blog together at www.rootsimple.com. I encourage you to check them out.
Erik normally only has eyes for rye, but he recently challenged himself to create a delicious, reliable whole grain sourdough recipe. If there is one bread I wish everyone could taste to see how beautiful a whole grain bread can be –- not at all heavy, dense and unappealing, but light and soft in texture with an open crumb and the rich, nutty flavor of the wheat shining through –- this is it. Thanks to Erik’s generosity, I am sharing his formula with you. It is the best representation of why I think local wheat and milling matter, and if we choose local wheat growing as an important crop to support, we will be rewarded in spades.
*Note: this is a two-day process. You will mix the dough and perform your bulk fermentation on day one, then do an overnight proof in the refrigerator. We recommend a dutch oven or combo cooker for baking the bread. See Erik’s blog post on this topic here:
http://www.rootsimple.com/2013/02/cooking-bread-in-a-dutch-oven-and-alternative-steaming-techniques/
and more insight on whole grain sourdough loaves from Erik here:
http://www.rootsimple.com/2015/02/three-things-ive-learned-about-baking-bread-with-whole-grain/
This recipe also calls for a sourdough starter, which you can create yourself with a little online research or purchase at Grist & Toll.
Formula
100 grams sourdough starter
450 grams Hard Red whole grain flour, such as Grist & Toll Joaquin Oro
450 grams 80ºF bottled water
12 grams sea salt
- Mix the dough:
Heat your water on the stove, if necessary, to bring it to 80º. In a lidded, non-reactive container (such as a large Tupperware tub or stainless steel bowl) stir the starter and salt into the 80 degree water until dissolved. Mix all the ingredients with your hands or a dough scraper until water and flour are incorporated. There is no need to knead but you must fully integrate flour and water so that there are no dry chunks of flour in the dough. Why is there no need to knead? In this very wet dough the gluten strands will align on their own without the need for mechanical development through kneading.
- Bulk fermentation: approximately 3 hours.
Let the dough sit in your covered plastic tub. Each hour, pour the dough out onto a floured surface using your dough scraper to help get the dough out. Quickly stretch and fold the dough pulling the right edge to meet the left and then pulling the left side to meet the right. Repeat 10 times and then put back into your lidded container. *Alternately, you can perform the stretch and folds with the dough in its plastic tub. Wetting your hands with water instead of coating them in flour will keep the dough from sticking, so have a bowl of room temp water nearby. Stretching and folding, while not quite the same as kneading, helps to develop the gluten. Be careful not to over-ferment the dough. If it’s a hot day you may need to shorten the fermentation time. Conversely, if your kitchen is cold, you may need to lengthen the fermentation slightly. This is the intuitive part of bread baking, knowing when the dough has fermented long enough. Keep in mind that sourdough is much less active than commercial yeast. The dough will not double in size. It will grow just slightly. The biggest difference will be in texture. The dough will start out as, well, just a wet mass of flour and water. After three hours it will be less sticky and ever so slightly gassy.
- Shape the dough:
At the end of the bulk fermentation it’s time to shape the loaf into a boule, French for “ball.” Pour the dough out onto a floured surface. Lightly deflate the dough. Take a corner and pull into the center of the dough 3 or 4 times rotating the loaf as you fold. Pick up the dough, flip over so that the smooth side is up. Let the dough rest for 10 to 15 minutes. Then lightly punch down the dough again and, cupping it with one hand, push it across the work surface while turning slightly. Using your other hand, pick up the dough and push it back a few inches. Then repeat cupping and pushing the dough 3 or 4 times with the other hand until the surface of the dough is tight and shiny. Now plop the boule good side (top) down into your canvas lined bowl or banneton. If using a cloth for the first time make sure that the cloth and the top of your loaf are well floured. New bannetons will also need to be well floured. Never wash your banneton or cloth.
*As I have previously posted to Facebook, here is the link to a San Francisco Baking Institute video on shaping high hydration dough:
https://www.youtube.com/watch?v=vEG1BjWroT0&feature=youtu.be
- Overnight proof:
Put your boule in its proofing basket into a 2-gallon plastic bag to keep the dough surface from drying out. Place in the refrigerator. The dough can sit in the fridge for 8 to 24 hours. The longer the dough ferments in the fridge the more sour the taste will be but also the more likely the dough will stick to the canvas and overproof. This second, long fermentation accomplishes two things: it helps develop flavor and allows flexibility in terms of when you choose to bake your loaf.
Baking
- Preheat your oven and a cast iron pot, such as a Lodge combo cooker, to 475 degrees.
- Take your dough out of the fridge–no need to bring it to room temperature. Quickly turn the bowl (or banneton) upside down and thump the boule out onto a floured surface. You may have to gently assist the dough if it sticks.
- Slash the boule with a sharp razor blade. The slashes will keep the loaf from bursting out as it rises and begins to bake in the oven. I like to cut a 4-inch square in the center of the loaf.
- Remove the pre-heated pot from the stove. Stick your hands under the loaf and gently lift and drop it into the pot, being very careful not to burn yourself. If using a Lodge combo cooker, you can drop the loaf straight into the shallow pan part of the pot and avoid having to transfer the dough from the counter to the pot (this is a reason to get that combo cooker!).
- Put the lid on the pot and place it back in the stove. Bake for 30 minutes.
- After 30 minutes remove the lid. Bake for another 25+ minutes or until the loaf is a dark chestnut brown. All ovens are different, so watch the color rather than the timer. Once the bread has reached a nice chestnut brown remove it from the pot and allow it to cool on a rack.
- Starter based loaves taste better once they’ve cooled. It’s tempting to break into a hot loaf but patience will reward you with better texture and flavor if you wait at least an hour (preferably longer) for the loaf to cool.
Variations
When you mix the dough you can add spices, nuts, dried fruit etc. One of my favorite variations is to add 1 1/2 cup of raisins and 1 1/2 teaspoons of toasted and ground coriander seeds. Or add 1 1/2 cup of pitted olives for an olive bread.